Thursday, September 26, 2013

Decorate with Buntings (Banners)

Crochet Your Own Fall Bunting/Banner!
Use them Inside or Outside


One day last week, I had a few hours and decided to make my own Fall banner.  And, my tool of choice is always crocheting.  I don't have a pattern, per se, but here's what I did:
Flag Triangles:

They are all single stitches.
Crochet 20 single stitches - adjust to the size you want.
In the next 8 rows, single stitch but decrease each row by 1.
Make as many as you'd like - I made 10.

Crochet as many single stitches as you'd like - this will be the length of your bunting.
I single crocheted the row again so it would be thicker.
Attach (needle & thread or crochet it on) the flags to the bunting line.


That's it!


I hung mine outside since the bunting is washable.  They would be cute for Christmas too.  Maybe even make some small flags for the bunting and hang them on your tree.


Tuesday, August 27, 2013

50 Hand Crocheted Washcloths - An Order for a Boutique!

 
Just Finished Up an Order of 50 Hand Crocheted Washcloths for a Boutique in Pasadena!
 
... in a week
... 8 x 8
... with a border
... 2 day shipment
 
 
Whew!
 
 
Let me tell you ... I finally know what it means when people say "my fingers hurt to the bone."


Happy = Happy = Happy = Happy
Annabelle

Sunday, July 14, 2013

Washcloths - Black and Blue with Pink and White 1

Washcloths - Black and Blue with Pink and White 1 by Annabelle Baskets
Multicolored Dish Cloths - Great for the Kitchen
Washcloths - Black and Blue with Pink and White 1, a photo by Annabelle Baskets on Flickr.
Kitchen washcloths don't have to match . Matchy-matchy is a thing of the past. Here's the pattern if you'd like to give it a try:

http://handmadebyannabelle.blogspot.com/2010/04/crochet-pattern-not-your-grandmas.html

If you use one of my patterns, please give credit where credit is due. Thank you.

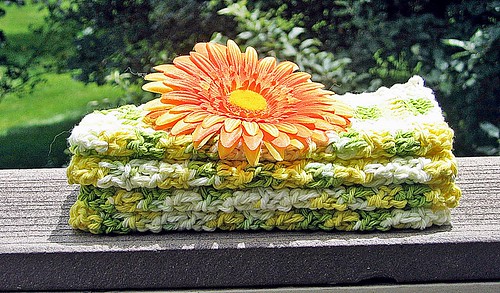
Washcloths - Yellow and Green and White Set of 4

## Easy ## Sweet set of 4 yellow and green and white dish rags.

Here's the free pattern if you'd like to try it yourself:

http://handmadebyannabelle.blogspot.com/2010/04/crochet-pattern-not-your-grandmas.html

Via Flickr:
Handmade Crochet Dish Cloths, Dish Rags, Yellow and Green. Pattern can be found here; handmadebyannabelle.blogspot.com/2010/04/crochet-pattern-...

Monday, July 8, 2013

How To Make Your Own Rag Basket


Fabric Rag Baskets
How-To Make Your Own
(Last updated 7-8-13)


I'm getting ready to make up a bunch of new rag baskets because I'm all stocked up with fabric, but first thought I'd show you some of my pictures from ones I've already made.
 
The one with the green polka-dots and flower liner is my favorite.


Materials Needed:
1 yard of leftover fabric (I buy discounted shirts or sweaters from the dollar store)
1 yard of cording (fabric store) or rope (dollar store)
Hot glue gun and glue

How To:

1.  Cut your fabric into long pieces (even up to a couple of feet).  It's easier if the fabric is one long piece instead of broken up pieces.  Cut the fabric into 1 inch wide.
2.  Keep your cording or rope all together - do not cut it until necessary.
3.  Begin wrapping your fabric around the cording glueing it to the cording about every 1-2 inches.
4.  Continue wrapping and glueing.
5.  Here's the fun part - once you have several feet wrapped, begin shaping your basket into an oblong or round basket, glueing the cording together as needed.  There are several pictures in this post to show you your options.

The red basket in the middle is also one of my favorites.


Sorry that I don't have any how-to pictures with this post, but I'll update this post with pictures along the way this time.  Hopefully this will get you started for now.  The pictures here are some of my most popular baskets from my ETSY shop.  Enjoy and have fun making them!

 
My ETSY shop has some of these baskets. 


Good luck!

Annabelle

Wednesday, June 5, 2013

Make Your Own Drink Cozies

Simple Crochet Pattern for Crochet Drink Cozies
6-5-13 (Last Updated)
 

I posted my pattern last week for the Red White & Blue Drink Cozy which is a super easy pattern to make.  This week I've been making the same drink cozies but with different yarn and appliques.  Here are a few to give you some ideas of what you can make for your own home:


I have a few of these in my ETSY shop if you'd like to take a peek.

Sunday, May 19, 2013

8 Steps to Beautiful Crochet Washcloths

NOT YOUR GRANDMA'S WASHCLOTHS!
 
 
That's right, this washcloth pattern can be full of color and texture. 
Here's a sample for you to peek at:

 
This set is available in my ETSY Shop,
for $14.00 for 6 pretty washcloths!
 
If you'd prefer to make them yourself, follow this pattern:  Not Your Grandma's Washcloths!
 
 
(The yarn is Sugar 'n Cream. They are pretty standard stock at Joann's, but I'm not sure about other retailers. One of them is called "PartyTime." Good luck.)

Tuesday, April 23, 2013

Sweet Little Pink Crochet Basket - Handmade


I made this sweet basket today for my daughter's little girl.  She's a nanny and the little girl will be three soon.

If you'd like to make it, follow this pattern:   Annabelle Basket Pattern

Monday, April 22, 2013

7 Easy Steps to Make a Crochet Washcloth - Free Crochet Pattern: Not Your Grandma's Crochet Dish Cloths


Crochet Pattern
Not Your Your Grandma's
Crochet Dish Cloth


That's right!  These are Not Your Grandma's Dish Cloths!  They are full of color and style!

(Last updated 7-10-13)

NOTE:  If you'd rather I make them for you, click here for my ETSY page.
  1. Leave a 3 inch tail
  2. 27 single stitches
  3. * Double crochet in 2nd stitch from hook (Total of 26 double stitches -- it's okay if it's 25, 26, or 27)
  4. Chain 2
  5. Turn *
  6. Continue from *
  7. Make as many rows as you'd like, but just make sure that your dish cloth is square. It should be the same size all the way around. The size usually comes out to 5x5, 6x6, ...
I used Sugar and Cream yarn for this tutorial. And an "H" or "I" crochet hook is fine. It's inexpensive and you can usually get about 2 wash/dish cloths from one roll.


NOTE:  This is my own pattern.  You may post it on your blog, etc.  Please credit the original designer (me).

Thursday, April 4, 2013

How to Crochet a Child's Poncho - 8 Quick and Easy Steps

8 Quick and Easy Steps to Make a Child's Poncho
Crochet Pattern

It's finally here! S[romg!   I've been wanting to crochet my little girl a poncho for the longest time.  So last week was the week.  This is my own design and I posted it on http://www.instructables.com/id/How-to-Crochet-a-Childs-Poncho-8-Quick-and-Easy/ because I've been trying to keep my own designs in one place. 

It took 3 balls of chunky yarn (see "Materials" in the doc) and about 6 hours.  If you're a faster crocheter than I am, you'll probably finish it up much quicker.
At any rate, I made a darling poncho for $12.00.  Maybe it should be called "The Recession Poncho!"

** NOTE:  Please come back and post a link to your poncho after making it!  I'd love to see other ones completed with different yarn **

Click here to see what I have for sale on ETSY!

Saturday, March 23, 2013

4 Quick and Easy Steps to Making and Folding Crochet Washcloth Bunnies or Boo Boo Bunnies

"Washcloth Bunnies" or "Boo Boo Bunnies"
Crochet Washcloth Bunnies 012 by Annabelle Baskets
They are super easy to make!
To Make the Washcloths:
1. Follow this pattern to make the washcloths or grab any washcloth from your kitchen or bathroom. 

To Fold into Bunnies:
(I'll take pictures the next time I fold some.)
1. Lay your washcloth out flat.
2. Roll from the bottom right corner to the top left corner. (Like a crescent roll.)
3. Fold the roll in half.
4. Tie a ribbon around the middle.
That's it!
How cute are these?
You can use them as Easter decorations (or gifts) and as "Boo Boo Bunnies". Boo Boo Bunnies - put an ice cube inside the center of the washcloth and use for your little one's boo boo's.  
Soon I'll have some in my ETSY shop if you'd rather I make them for you.
Have fun and leave me a comment if you'd like.
Annabelle

Friday, March 8, 2013

Make a Crochet Basket


Make Your Own Crochet Basket

(NOTE:  The below pattern is for the red, white, & blue basket) 
 
** Draft **

 
These are variations of the below pattern:


If you want to give it a try, I have drafted the instructions below for crocheting a basket.

Hook - 4.0
Yarn - I used 100% cotton.  But if you want a really sturdy basket, use 2 strands of 100% cotton or something heavier like wool.

  • I start my crochet baskets off with my crochet coaster pattern.  Follow this pattern for the bottom of the basket.
  • Once you get the bottom finished, single stitch all the way around, but only grab the back loop of the row.  You will soon see that grabbing the back loop only makes the bottom ridge and begins the sides of the basket.
  • If this is your first basket, you may choose to make it in one color instead of switching colors as I have done.  If you do decide to switch colors, there isn't any magic to this, just change colors when you think it will look best.  
  • Single stitch all the way around, grabbing both loops and keep going.  Do not slip stitch -- just keep going until you get the height you want.

It's really that easy!

(Bottom)


(Sides)

Hope this helps and good luck on your first basket!

Annabelle
Pinterest Page: 

Tuesday, February 19, 2013

Annabelle's 2013 Easter Basket

Annabelle's Easter Basket 2013
For you crocheters, I'll be posting this pattern soon !!  I just couldn't wait to get the picture posted.  It's so cute in person!

Annabelle

Saturday, February 16, 2013

So Sweet: Little Girl's Easter Basket & Potpourri Sachet

EASTER BASKET & POTPOURRI SACHET:

 
Cute, right?
 
For you crocheters, check back here for a pattern for both the basket and sachet soon.
 
You can find my Easter Set here in my ETSY shop, HandmadeByAnnabelle.


Annabelle

Tuesday, February 12, 2013

Simple Crochet Ribbon Bracelet / Bangle


Annabelle's Ribbon Bracelet / Bangle

    100% cotton - Sugar & Cream Yarn
    Hook:  4.0 (F)

  • 25 single stitches
  • Slip stitch with beginning of row (do not add any ss here)
  • Continue with ss in each stitch
  • 1 row of double stitches
  • 2 rows of single stitches
  • Wrap yarn or ribbon around the center - (Shhh:  Don't tell on me, but I used hot glue to glue the beginning and end of the string onto the bracelet.)

I'll be adding these to my ETSY shop if you'd rather I make them for you.


Creative Ideas:  Use a different color for the center wrapped yarn; Use some jewelry pieces in the band; Use some buttons; Use the colors of the season (IE: red, white, and blue like these); Use your imagination !!

Leave a comment if you have any questions.


If you like my ribbon bracelets, please Pin It!

Annabelle


Saturday, February 9, 2013

Quick and Easy Crochet Backpack


Crochet Backpack with Stripes
I made this sweet little backpack for my daughter's little girl.  (She's a nanny and the little girl is 2.)  The backpack with the flowers is the same pattern.

Wouldn't this be a fun gift for a little girl on Easter or a Spring/Summer birthday?

The next time I make it, I'll post the instructions here on my blog.


Lovin' it!  Click here to see this sweet backpack in my ETSY shop!

I'm adding instructions as I go along making my next backpack.  Here's the first one: 
Flower Pedals Instructions **Draft**:

(Note:  The stem is just 20 SS's)
Needle size 5.0
Chain 7 (do not turn)
Single stitch in first stitch
DS in next 5 stitches
SS in last stitch
SS twice
SS into the first stitch on the top
DS in next 5 stitches
SS into last stitch
That's it!  You've done it!
 Annabelle